The notes below apply if you run a small web design studio that needs to assure a good level of service to your clients with the most efficiency.
This means cutting down repetitvie tasks, like setting up a Google Analytics Account for every website a client needs.
Google Analytics
To begin, we need some configuration on Google Analytics, later we will tie it all down with Nginx.
Step One, Setting up a Google Analytics Account and Property
Pretty self explanatory really. Just set up an account, let’s call it StudioX and create a property called Client 1.
The property’s settings can be whatever you wish, just make sure that the default URL is real.
Step by step instructions to set up the Account and property are available here: https://support.google.com/analytics/answer/1008015?hl=en
Grab the tracking code and ID, we will need it later. It’s something like this:
<!-- Global site tag (gtag.js) - Google Analytics -->
<script async src="https://www.googletagmanager.com/gtag/js?id=UA-XXXXXXXX-XX"></script>
<script>
  window.dataLayer = window.dataLayer || [];
  function gtag(){dataLayer.push(arguments);}
  gtag('js', new Date());

  gtag('config', 'UA-XXXXXXXX-XX');
</script>
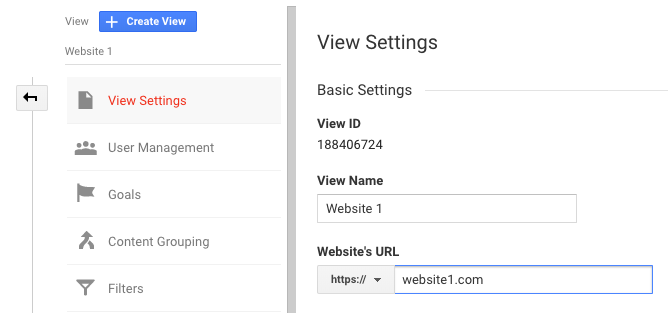
Step Two, One View for each Website
Let’s imagine Client 1 owns 2 websites that you have created, we will need to setup a data view for each of them.
At the view level you can set a new Default URL, and you can also set a switch for Bot filtering that removes the known bots to from your reports.
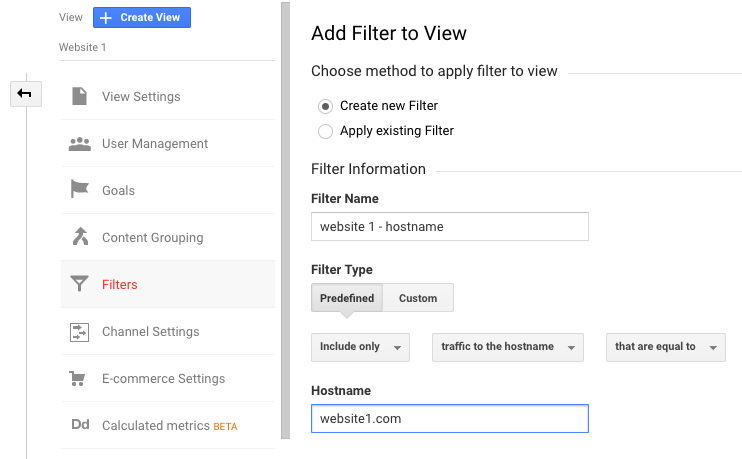
Step Three, Filter by hostname
This is straightforward, add a new filter to you view so that it only shows the hostname of the website we want to track.
Nginx
I was looking out for a way to use a main Google Analytics Account in all websites I host, and found this gist by Jakub Jirutka
https://gist.github.com/jirutka/5279057
It’s quite simple, in every website hosted by Nginx, it will replace the </head> tag for the google analytics code we had previously. After that’s done, we just include the analytics.conf file in the server block of our website.
What is below is an example, don’t just copy and paste it to your config.
server {

  listen 80;
  listen 443 ssl;
  server_name www.WEBSITE1.com WEBSITE1.com;
  include incl/analytics.conf;

  # certs sent to the client in SERVER HELLO are concatenated in ssl_certificate
  ssl_certificate /etc/letsencrypt/live/WEBSITE1.com/fullchain.pem;
  ssl_certificate_key /etc/letsencrypt/live/WEBSITE1.com/privkey.pem;
  ssl_trusted_certificate /etc/letsencrypt/live/WEBSITE1.com/fullchain.pem;
  ssl_session_timeout 1d;
  ssl_session_cache shared:SSL:50m;

  # Diffie-Hellman parameter for DHE ciphersuites, recommended 2048 bits
  ssl_dhparam /etc/nginx/ssl/dhparam.pem;

  # modern configuration. tweak to your needs.
  ssl_protocols TLSv1.1 TLSv1.2;
  ssl_ciphers 'YOUR CYPHERS GO HERE';
  ssl_prefer_server_ciphers on;

  # HSTS (ngx_http_headers_module is required) (15768000 seconds = 6 months)
  add_header Strict-Transport-Security max-age=15768000;

  # OCSP Stapling ---
  # fetch OCSP records from URL in ssl_certificate and cache them
  ssl_stapling on;
  ssl_stapling_verify on;

  root /var/web/WEBSITE1.com;
  index index.php index.html index.htm;


  location / {

    # try_files $uri $uri/ =404;
    try_files $uri $uri/ /index.php?q=$uri&$args;
  }


  # lets allow .wellknown challenge to pass so we can have https
  location /.well-known {
    allow all;
    auth_basic off;
  }

  error_page 404 /404.html;

  error_page 500 502 503 504 /50x.html;
  location = /50x.html {

    root /usr/share/nginx/html;
  }
}
Day to day
From now on, each time you need to track analytics for a new website that belongs to Client1, just add a new view, change the Default URL and setup the filter to only track traffic to that hostname.
It’s two steps in Google Analytics, instead of three in your Content Management System (CMS) and Analytics Account.
- Setting up a new property
- Installing the tracking code in the CMS
- Setting up a new view
I haven’t tested, but in theory you can setup your View after the site goes live. Your data should already be there because the Google Analytics Property was already collecting information, it just wasn’t filtering by hostname.
You can also create different analytics.conf files, one for each Client/Property you want to use. Something like analytics.client1.conf, analytics.client2.conf.
There is one small caveat, with this implementation you can only track 25 websites for that Property.
You can take it one step further by using the Google Tag Manager code. It’s the same procedure and you gain the hability to setup new events across all sites. Within Google Tag Manager you can also fire the analytics code, but that would be a matter for another article.
Feel free to leave a comment if you find something you would like to add.