If you are not a webdesigner or programmer, you probably want to skip this post. Click on https://brunoamaral.eu/categories/ to find something that is more worthy of your time.
For everyone else, a little background first. My this blog is built using Hugo and has the following sections:
- Posts
- Pages
- Stories
- Instagrams
And I wanted to track these elements as content groups in Google Analytics, using Google Tag Manager. Because I am not at all sure which of these drives more traffic and interest to the site.
You can configure 5 levels of content groups, and I wanted to configure the following:
| Posts | Pages | Stories (Section) | |
|---|---|---|---|
| Index 1 | Post | Page | Stories |
| Index 2 | nil | nil | StoryName |
| Index 3 | PostTitle | PageTitle | StoryArticleTitle |
Configure your Hugo theme
To get this information out of Hugo do this, I used the classes in the body tag.
_default/single.html
<body class="single contentgrouptype-{{ .Section }} contentgroupname-{{ with .Params.stories }}{{ index . 0 | urlize }}{{ end }} article article-title-{{ .Title |urlize }}">_default/page.html
<body class="single page contentgrouptype-{{ .Section }} contentgroupname-{{ .Title | urlize }}">Since the page for Instagrams has its own layout, I took advantage of that:
Instagrams/instagram.html
<body class="single instagram contentgrouptype-instagrams contentgroupname-{{ .URL }}" id="instagram">I should be using the title of the instragram post, with urlize. The reason I am not, is because my script still does not collect that information.
taxonomy/category.html
<body class="page contentgrouptype-category contentgroupname-{{ .Title | urlize }}">taxonomy/story.html
<body class="page subhomepage contentgrouptype-story contentgroupname-{{ .Params.story_title | urlize }}">taxonomy/tag.html
<body class="page contentgrouptype-tag contentgroupname-{{ .Title | urlize }}">Configure Google Tag Manager
First, we need to install Google Analytics from the Google Tag Manager tag.
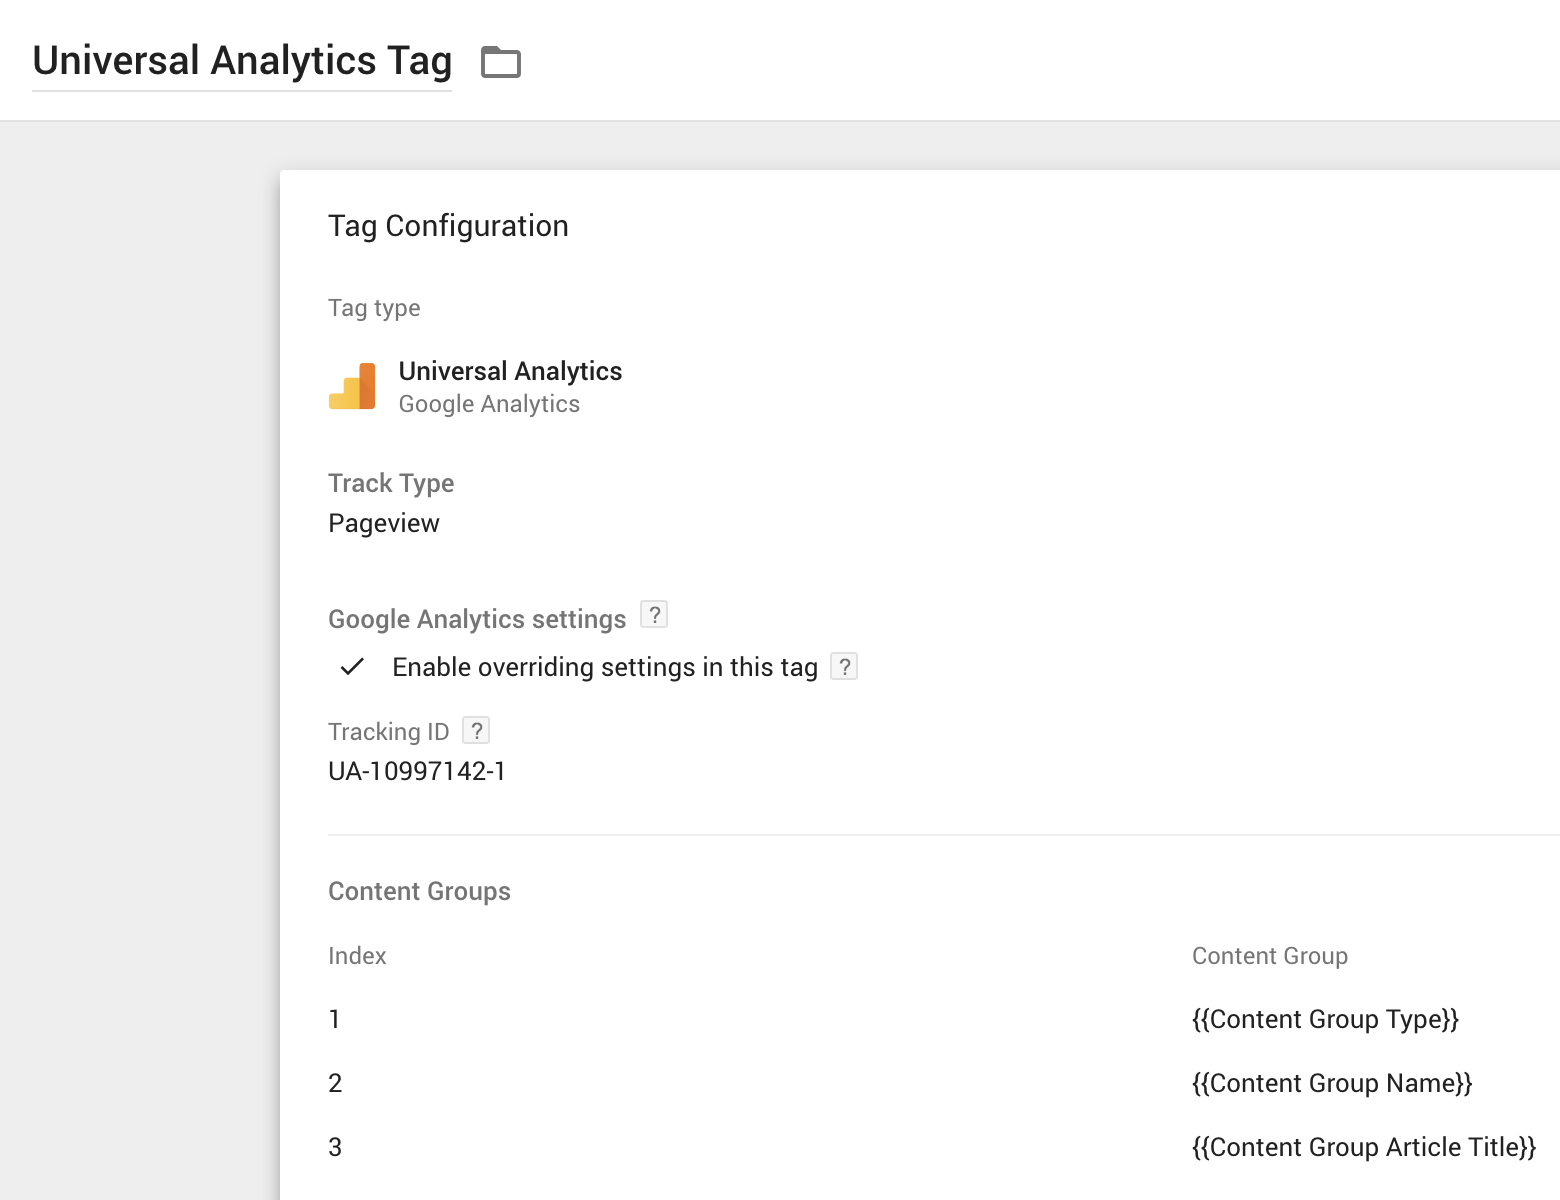
What you are seeing in {{ }} are variables that we need to create and configure to tie this together.
In Google Tag Manager, click on “Variables” and then “New”. Select “Page Variables” > “Custom Javascript”
Then use this code for the variable “Content Group Type”, which will have a value of “tag
- category
- stories”, or “instagrams”
// Identify if content group is a tag, category, story etc.
function(){
var contentgroupclass = document.body.classList;
 var dem = contentgroupclass.length;
 for (var i = 0; i <= dem; i++) {
    if (contentgroupclass[i].match('contentgrouptype-')) {
      var contentgroup = contentgroupclass[i].replace(/contentgrouptype-/g, '');
      return contentgroup;
      break;
    }
 }
}
The code for “Content Group Name” will follow the same structure:
function(){
var contentgroupnameclass = document.body.classList;
 var dem = contentgroupnameclass.length;
 for (var i = 0; i <= dem; i++) {
    if (contentgroupnameclass[i].match('contentgroupname-')) {
      var contentgroupname = contentgroupnameclass[i].replace(/contentgroupname-/g, '');
      return contentgroupname;
      break;
    }
 }
}
And finaly, the code for “Content Group Article Title”
function(){
var articletitleclass = document.body.classList;
 var dem = articletitleclass.length;
 for (var i = 0; i <= dem; i++) {
    if (articletitleclass[i].match('article-title-')) {
      var articletitle = articletitleclass[i].replace(/article-title-/g, '');
      return articletitle;
      break;
    }
 }
}
You are done.
Go to the preview of tag manager and check that it’s working in the different pages. Soon, you will begin to see this data arrive in Google Analytics
Custom Report
For my use case, I prepared a small custom report using the drilldown of the different content groups:
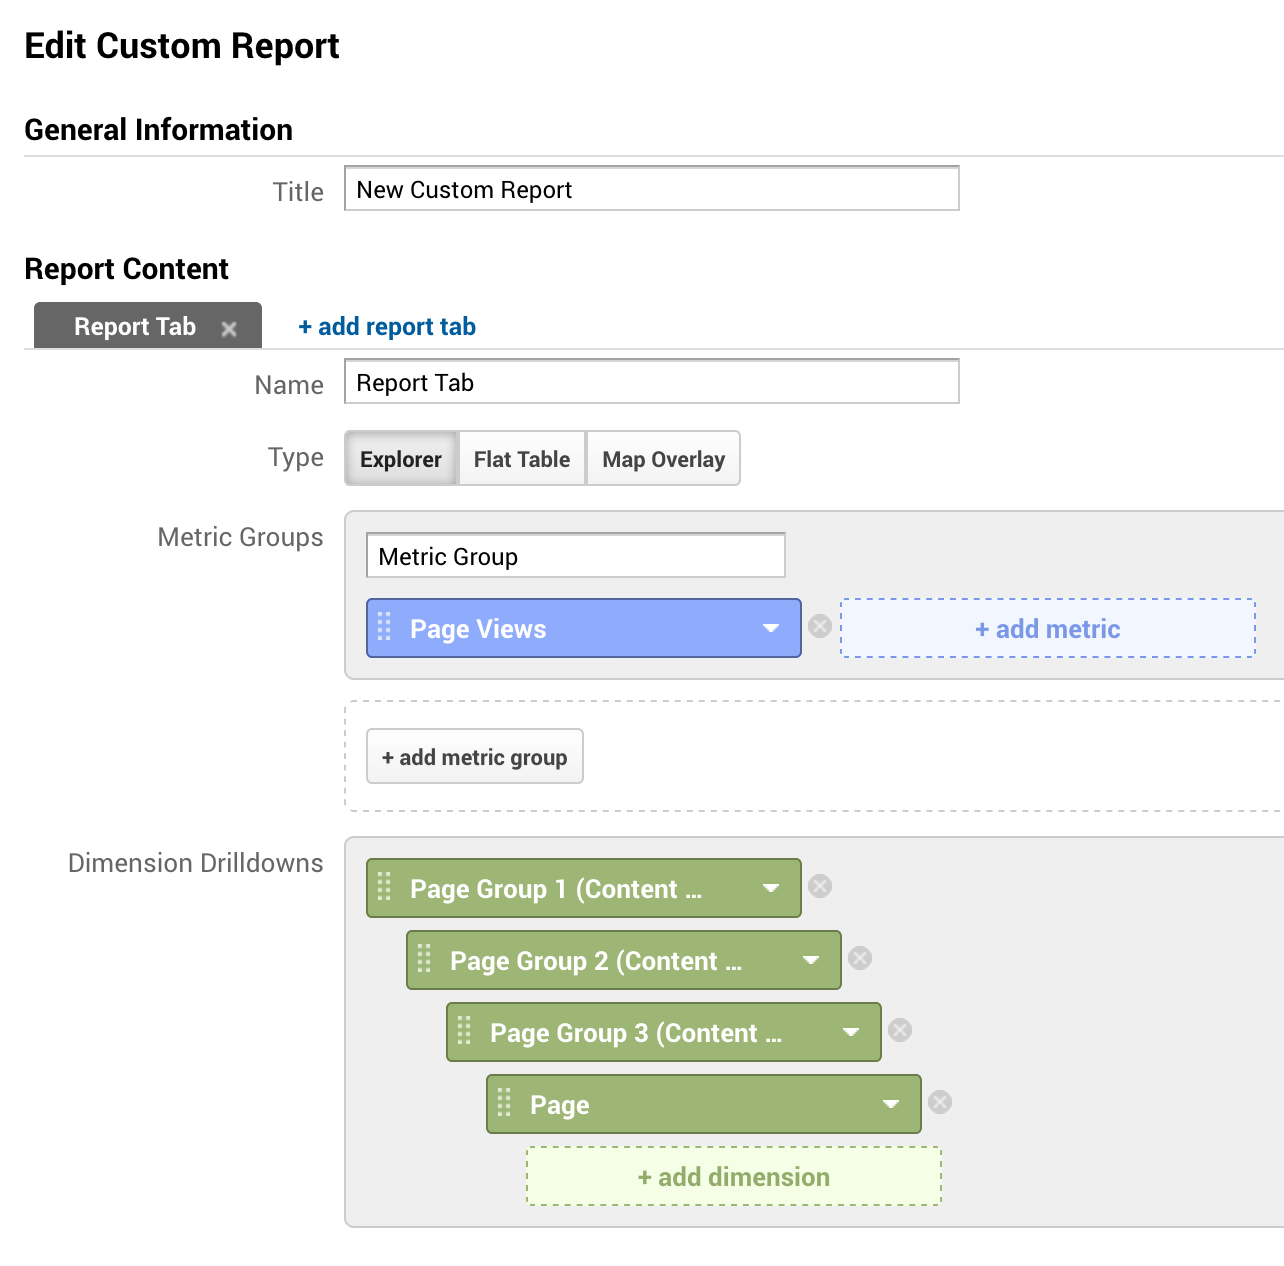
And this in turn gives you this report:
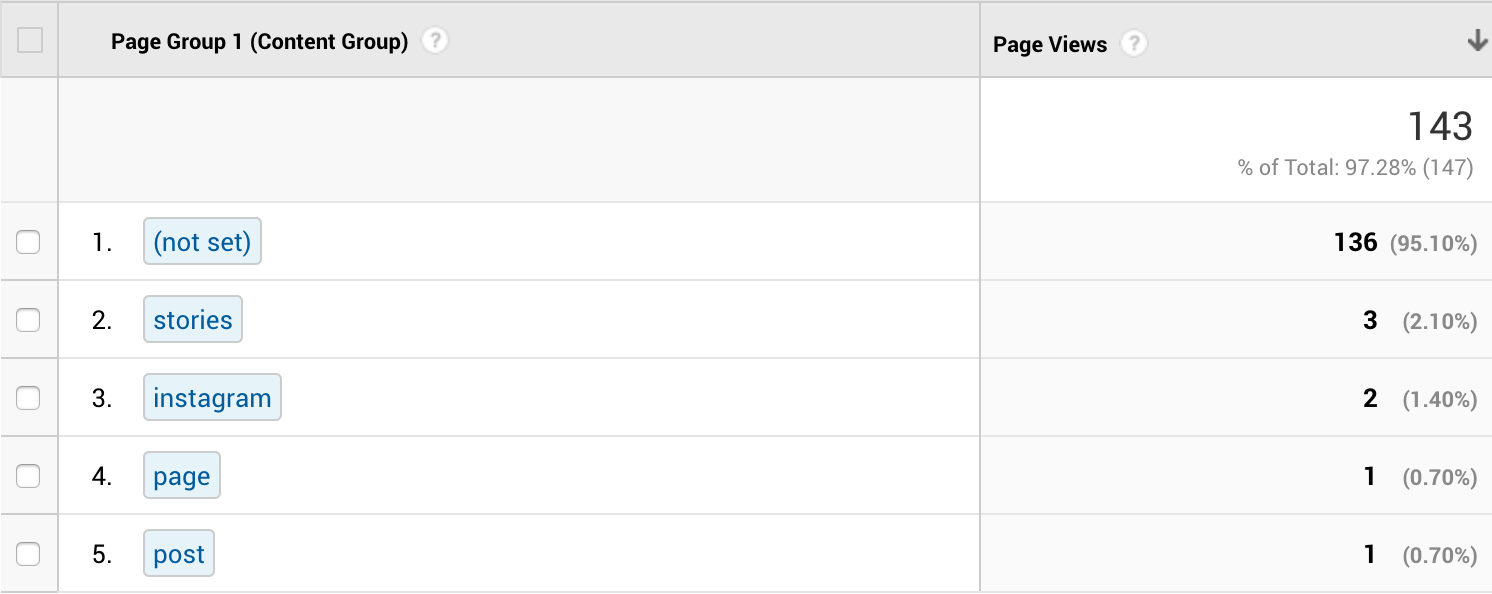
And that’s it, you can now use the new Content Groups to see where your readers see the most value.
Hope this helps!